MainPage:Nuclear:KaonDetector:Simulations:Codes
| This page is under construction. It requires a review! |
| ⇐ Back to the Kaon Detector page |
General commands
Copying files: personal computer <=> JLab
In our simulations using GEMC, there are three layers that one can work with files:
- Personal computer
- JLab login computer
- ifarml64
I don't know if there is a smarter way to transfer files from a personal computer to ifarml64 (and vice-versa). But here is a way to do this, using the unix SCP command.
Copying files from a personal computer to ifarml64:
- Copy the file from your computer to the JLab login computer (type this command in the folder where the original file is placed):
- scp <FileName> username@login.jlab.org:~/
- Login to the Jlab login computer:
- ssh -X username@login.jlab.org
- Copy the file to ifarml64:
- scp <FileName> username@ifarml64:~/
Copying files from ifarml64 to a personal computer:
- Login to the JLab login computer:
- ssh -X username@login.jlab.org
- Copy the file from ifarml64 to the JLab login computer:
- scp username@ifaml64:~/<FileName> ~/
- Exit of the JLab login computer:
- exit
- Copy the file to your personal computer:
- scp username@login.jlab.org:~/<FileName> ~/
Mirrors definition
There are two ways to work with mirrors on GEMC. The first one is to define the mirror in the definition of the material, and recompile the GEMC. But the easiest way is to specify the mirror in the "identifiers" field of a geometry definition, in the 'pl' file.
The parameters that can be specified using the identifiers field are:
- WithSurface: 1 (0: dielectric_metal; 1: dielectric_dielectric)
- With Finish: 1 (0: polished; 1: ground)
- Refraction Index: 1030000 (r*1M - this corresponds to 1.03)
- With Reflectivity: 550000 (R*1M - this corresponds to 0.55)
- With Efficiency: 400000 (E*1M - this corresponds to 0.40)
- WithBorderVolume: HTTC (border volume, necessary, must be at the end)
The way to use it in the detector definition is:
$detector{"identifiers"} = "Mirror WithSurface: 1 With Finish: 1 Refraction Index: 1030000 With Reflectivity: 1000000 With Efficiency: 1000000 WithBorderVolume: daughter10";
The code that reads the of the mirror definition of the geometry is inside the MDetectorConstruction.cc. More details in how the GEMC reads these parameters can be understand from looking at this file.
Written codes to process data
Pi0 detector
- Converting Ibraim output file to GEMC input:
First Simulations on GEMC
For the study of the Kaon Aerogel Cerenkov Detector in the SHMS, some simulations are being prepared using GEMC code. GEMC is a code based on the Geant4.
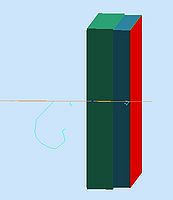
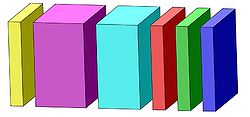
A first model of the detector was constructed using the standard library of the GEMC, with the standard materials and geometries. The following pictures show this first simplified model of the detector.
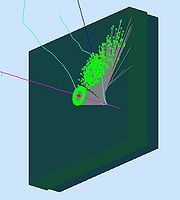
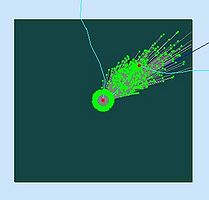
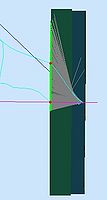
Setting the GEMC code to work with material optical properties, a high momentum Pion was generated to pass through the aerogel. The following pictures shows the first results on these simulation. The end plate was set to absorb the photons, so it was possible to see the cone of photons generated by the Cerenkov phenomena.
